ログイン
この章ではログイン周りの実装を紹介する。
React を利用したユーザーのログインは自前で API をたったき、帰ってきた Access Token を自前でヘッダーに納めたりして、実装する。
このとき、ログインユーザーの情報を持つ場所をどこにするかが重要である。 この辺りの React での試行錯誤は単純な State 管理から Redux、そして AppContext へ変遷していった。
単純なステートでログインユーザーの管理するのが難しいのは、 下位のコンポーネントがユーザー情報を必要とした時に、prop drilling という現象が起きてしまうからである。
例えば、ヘッダーのプルダウンのリストのアイテムの画像コンポーネントがユーザーの情報を必要とした時に、 各コンポーネントは全てログインユーザーのオブジェクトを渡していかなくてはならない。 労力と管理のめんどくささに目を瞑れば、問題はないがベターではない。
ここで利用する AppContext は最も階層の高い_app.jsxにグローバルで利用する変数や関数を用意し、
それを下位のコンポーネントが使いたい時に宣言するだけで利用できる仕組みだ。
これで、いちいち情報を渡していかくても利用できる。
一見便利なグローバルな仕組みだが、値が明示的に渡されないということはデメリットもある。 こうしたグローバルな値を持つコンポーネントは汎用性を失う。 props で渡すのではなく、あらかじめ上位のコンポーネントでこれこれの変数および関数を宣言してグローバルにしておいてねという約束が生まれる。 また、そうやって上位で宣言された変数の型や情報が変化するとそれを利用するコンポーネントでもエラーが発生しうる。 なので、便利だからといって多用すると管理が難しくなるので、多用には気をつけたい。
ログインの確認
ログインの機構は特に準備をしなくてもすでに devise 経由で利用できる。
curl コマンドを利用してログインしてみる。
curl -X POST -v http://localhost:3001/auth/sign_in -d '[email]=alice@example.com&[password]=password'
戻ってくる値には access-token などは入っていない。
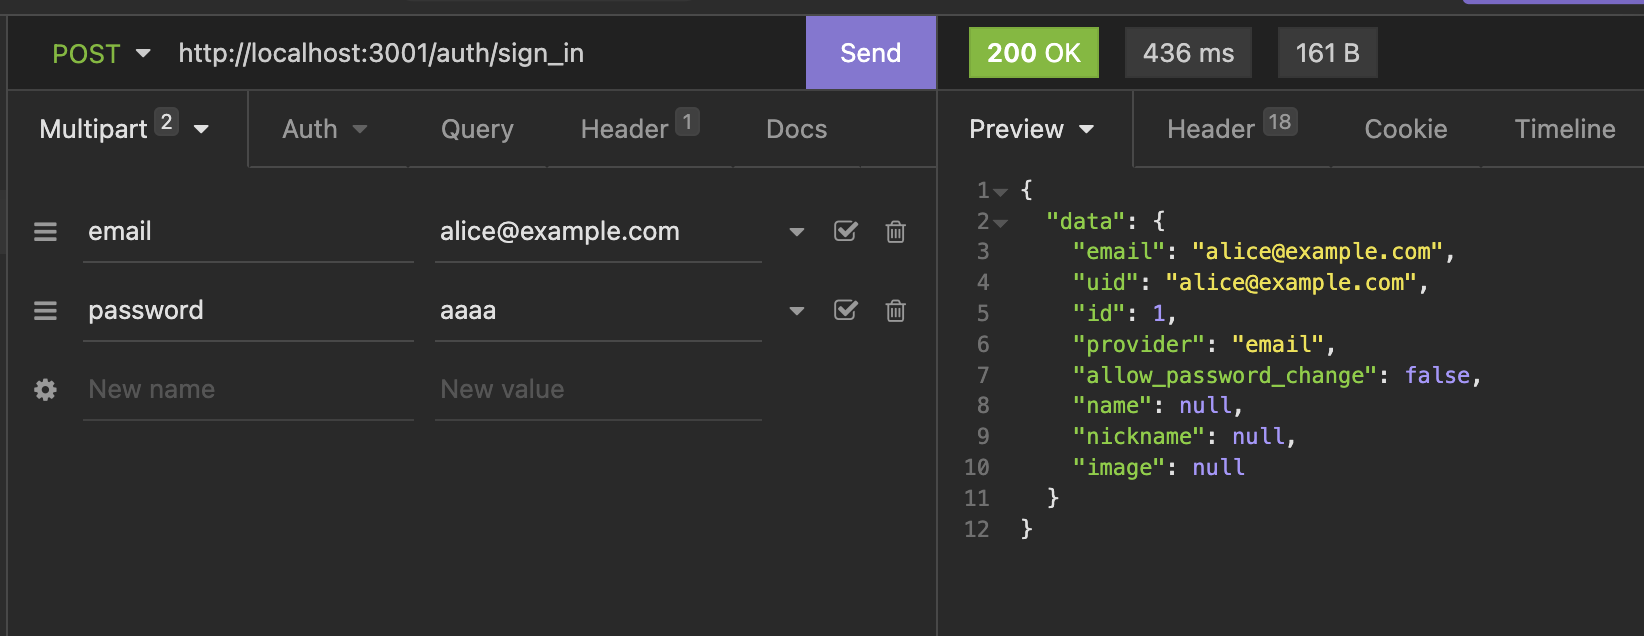
リターン header の方にある。
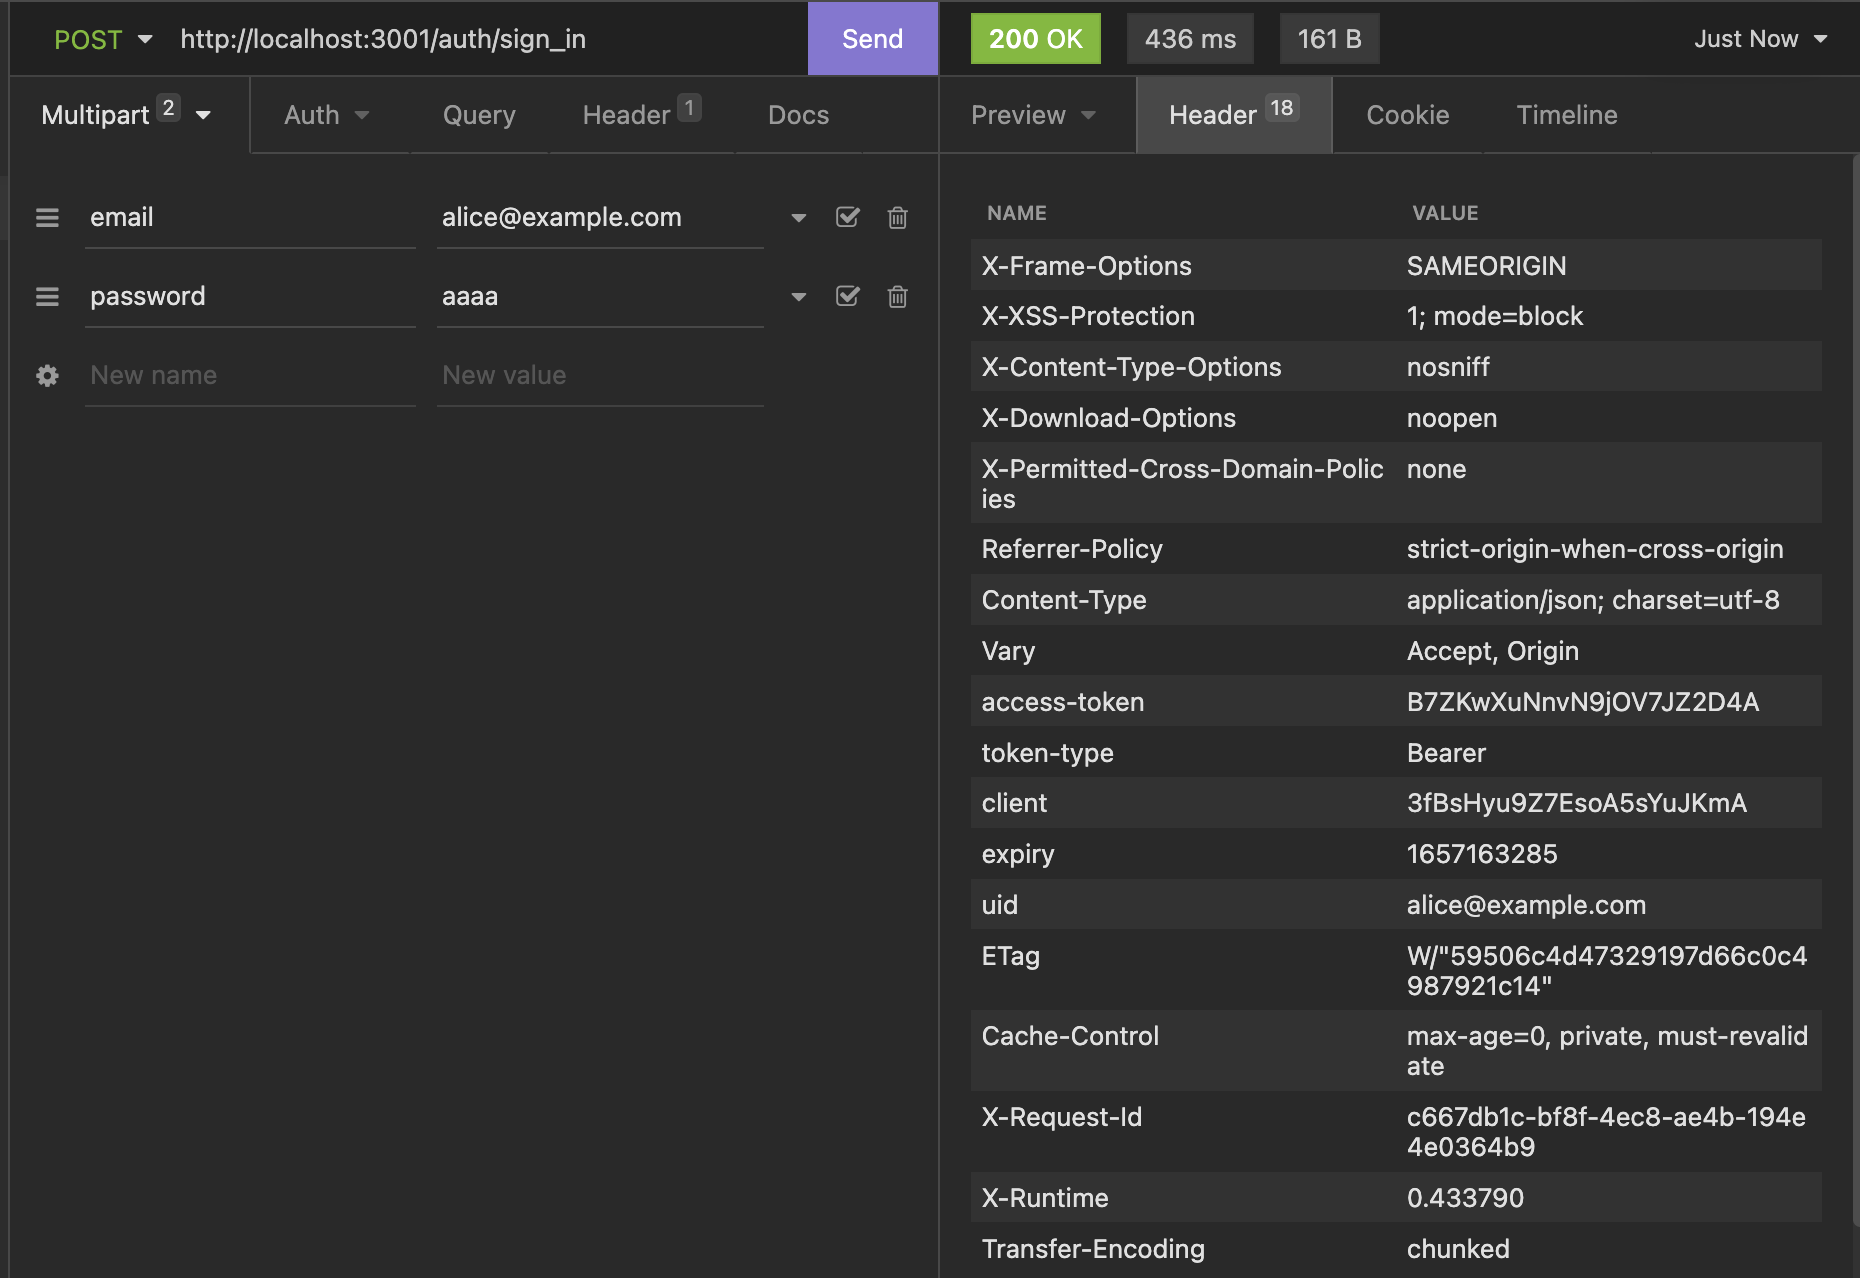
access-token があるのでこれをフロントでは Cookie に保存し、サーバーにアクセスするときは Header に納めればログインができる。
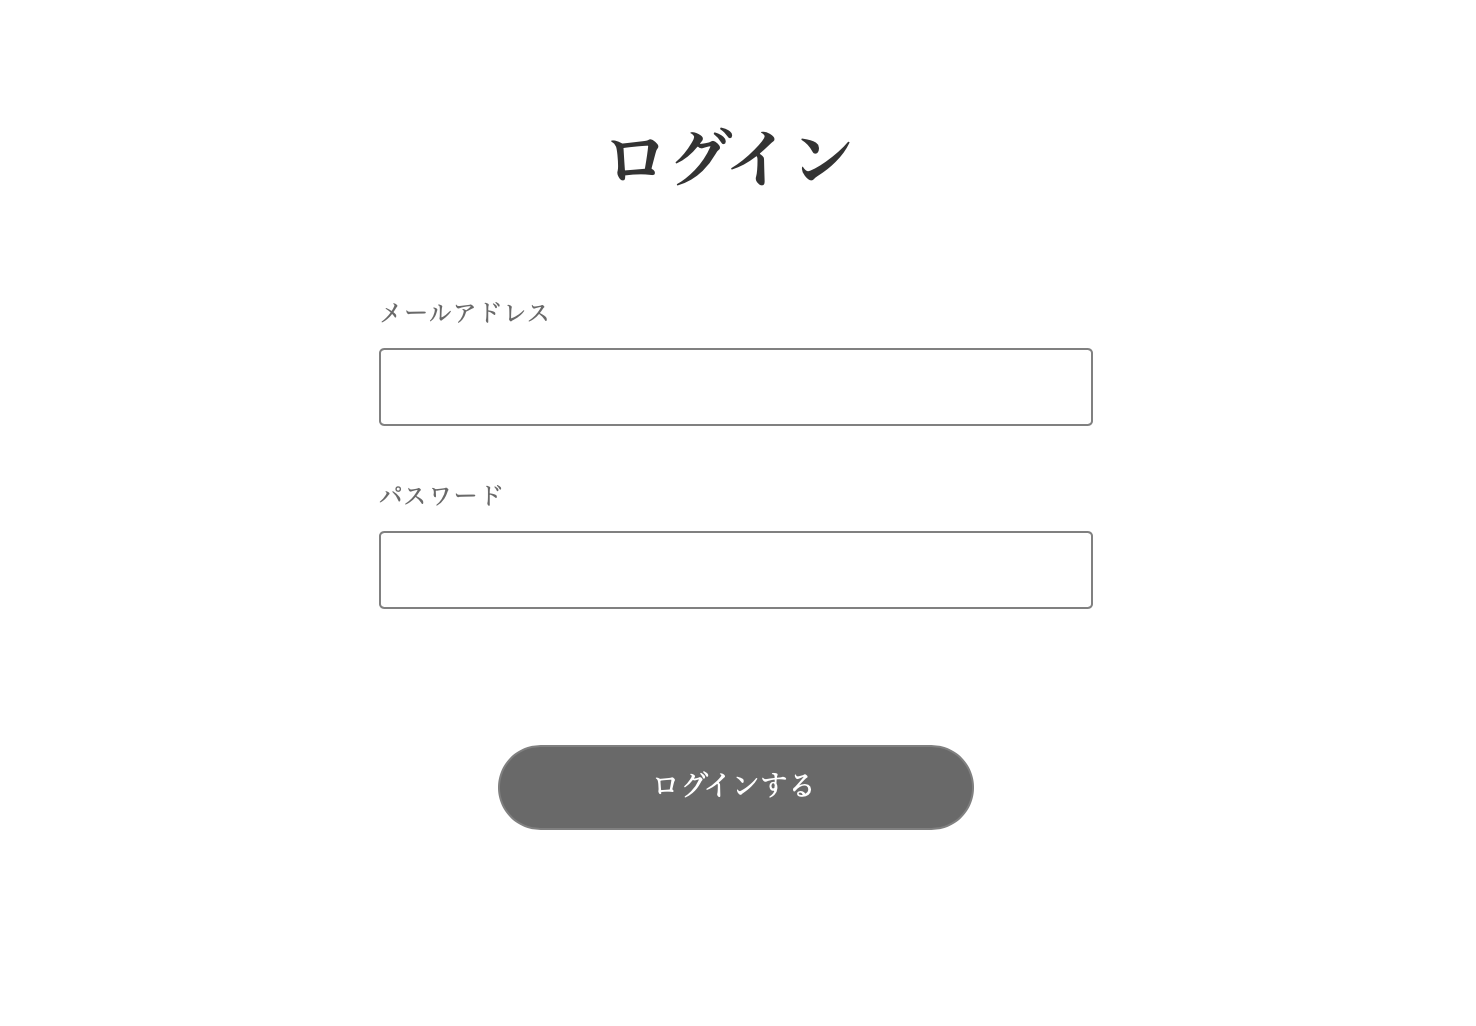
ログイン画面の作成とマークアップ
ログイン画面はメールアドレス、パスワードを入力をさせ、認証成功後はホームへリダイレクトさせる。
Next.js プロジェクトに移動して、pagesフォルダに sign_in ページを作成する。
touch pages/sign_in.jsx
マークアップの構造は基本的に sign_up.jsx と同じである。
import Head from 'next/head'
import { Text, Box, Clickable, TextField } from '../atomic/'

export default function SignIn() {
  return (
    <div>
      <Head>
        <title>ログイン</title>
        <meta name="description" content="ログイン" />
        <link rel="icon" href="/favicon.ico" />
      </Head>

      <Box as="main" mt={[60, null, 80]}>
        <Text
          as="h1"
          textAlign="center"
          fontSize={[26, null, 36]}
          fontWeight={700}
          lineHeight={['26px', null, '36px']}
          letterSpacing={[1.3, null, 1.8]}
          color="#333"
        >
          ログイン
        </Text>
        <Box mt={[40, null, 60]} px={[16, null, 0]} width={['100%', 420]} mx="auto">
          <Text fontSize={14} lineHeight="1.71" letterSpacing={0.7} color="dimgray">
            メールアドレス
          </Text>
          <TextField
            name="email"
            height={46}
            width="100%"
            borderColor="gray"
            borderWidth={1}
            borderRadius={3}
            py={10}
            pl={14}
            fontColor="black"
            fontSize={16}
            letterSpacing={0.8}
            mt={8}
          />
          <Text fontSize={14} lineHeight="1.71" letterSpacing={0.7} color="dimgray" mt={30}>
            パスワード
          </Text>

          <TextField
            type="password"
            name="password"
            height={46}
            width="100%"
            borderColor="gray"
            borderWidth={1}
            borderRadius={3}
            py={10}
            pl={14}
            fontColor="black"
            fontSize={16}
            letterSpacing={0.8}
            mt={8}
          />
          <Clickable
            width={[220, null, 280]}
            height={[44, null, 50]}
            borderRadius={[44 / 2, null, 50 / 2]}
            bg="dimgray"
            color="white"
            hoverShadow="silver"
            borderColor="gray"
            borderWidth={1}
            display="flex"
            alignItems="center"
            justifyContent="center"
            overflow="hidden"
            mt={80}
            mx="auto"
          >
            ログインする
          </Clickable>
        </Box>
      </Box>
    </div>
  )
}
一度ここでコミットしておく。
git add .
git commit -m "Create a sign in page and markup one"
フォームのバリデーション
次にフォームのバリデーションを行う。 ログインフォームでは基本的に空でない場合以外は通すような緩いバリデーションで良い。
userform をインポートする。
import { useForm } from 'react-hook-form'
SignIn()関数に以下を書き込む。
export default function SignIn() {
 const {register, handleSubmit, watch, formState: { errors }} = useForm()
 ...省略...
}
フォームの値を送信する関数onSubmitを作成する。
const onSubmit = async (data) => {
  console.log(data)
  const params = {
    email: data.email,
    password: data.password,
  }
  console.log(params)
}
jsx のemailのテキストフィールド DOM に react hook form のバリデーションを加える。
正規表現でメールアドレスのパターンを記述してある。
emailDOM の直下にエラーメッセージを表示するロジックを加える。
<TextField
  name="email"
  {...register('email', {
    required: true,
    pattern: {
      value: /^[A-Z0-9._%+-]+@[A-Z0-9.-]+\.[A-Z]{2,}$/i,
     },
  })}
  ...省略...
/>
{'email' in errors && (
  <Text fontSize={12} lineHeight="22px" letterSpacing={0.6} color="red" mt={8}>
    {errors.email?.type === 'required' && 'メールアドレスは必須です'}
    {errors.email?.type === 'pattern' && 'メールアドレスの形式が正しくありません'}
  </Text>
)}
passwordのテキストフィールド DOM に react hook form のバリデーションを加える。
passwordDOM の直下にエラーメッセージを表示するロジックを加える。
<TextField
  name="password"
  {...register('password', {
    required: true,
  })}
  ...省略...
/>
{'password' in errors && (
  <Text fontSize={12} lineHeight="22px" letterSpacing={0.6} color="red" mt={8}>
    {errors.password?.type === 'required' && 'パスワードは必須です'}
  </Text>
)}
最後に「ログインする」ボタンに onSubmit を加えて完成である。
<Clickable
  ...省略...
  onClick={handleSubmit(onSubmit)}
>
  ログインする
</Clickable>
ブラウザで挙動を試してみる。

git add .
git commit -m "Create a sign in form validation"
ローディングアニメーション
ThreeDots コンポーネントをインポート。
アニメショーン中であるというステートを持つ必要があるので、useState もインポートする。
import { useState } from 'react'
import { Text, Box, TextField, Clickable, ThreeDots } from '../atomic/'
次にSignIn() 関数の外にsleep関数を作成する。
const sleep = (msec) => new Promise((resolve) => setTimeout(resolve, msec))
SignIn()関数の中でまずは通信中かを判定するステートを作成する。
const [animation, setAnime] = useState(false)
onSubmit 関数を変更して擬似的な通信中の処理を加える。awit sleep のところがそれである。
const onSubmit = async (data) => {
  const params = {
    email: data.email,
    password: data.password,
    passwordConfirmation: data.passwordConfirmation,
    confirmSuccessUrl: 'http://localhost:3000/confirmation',
  }
  console.log(params)

  setAnime(true)
  await sleep(1500)
  setAnime(false)
}
最後にログインするボタンの DOM をanimationステートによって切り替わる様にする。
<Clickable
  ...省略...
  onClick={handleSubmit(onSubmit)}
  >
    {animation ? <ThreeDots bg="white" /> : <>ログインする</>}
</Clickable>
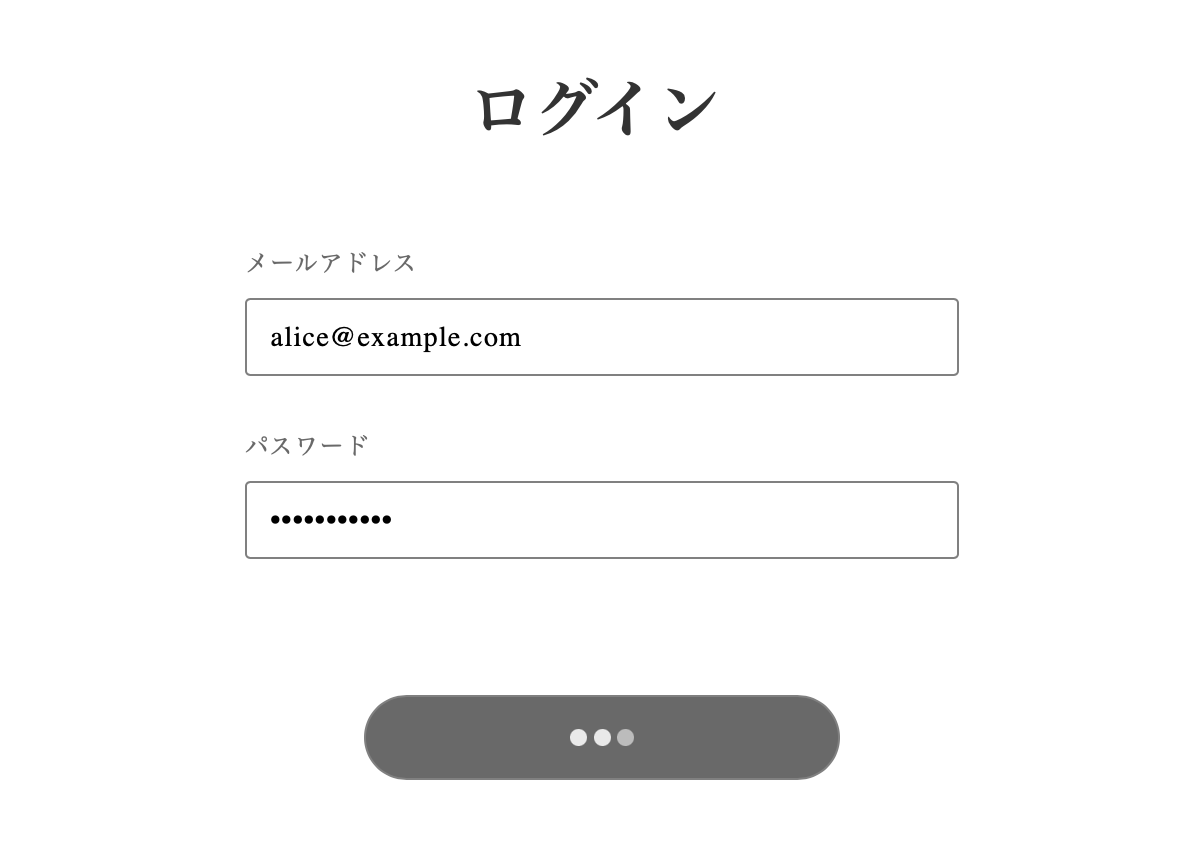
フォームを入力し、ボタンを押すとアニメーションに切り替わる。
git add .
git commit -m "Create a sign in button loading animation"
ログインの通信処理
ログインのエンドポイントを叩く関数を作成する。
export const signIn = (params) => {
  return client.post('auth/sign_in', null, {
    params,
  })
}
sign_inページでsignIn関数をインポート。
import { signIn } from '../lib/api/user'
onSubmitを書き換える。
const onSubmit = async (data) => {
  const params = {
    email: data.email,
    password: data.password,
  }
  console.log(params)
  setAnime(true)
  try {
    const res = await signIn(params)
    //await sleep(1500)
    console.log(res)

    if (res.status === 200) {
      console.log('Signed in successfully!')
    } else {
      console.log('some thig went wrong')
    }
  } catch (err) {
    console.log(err)
  }
  setAnime(false)
}
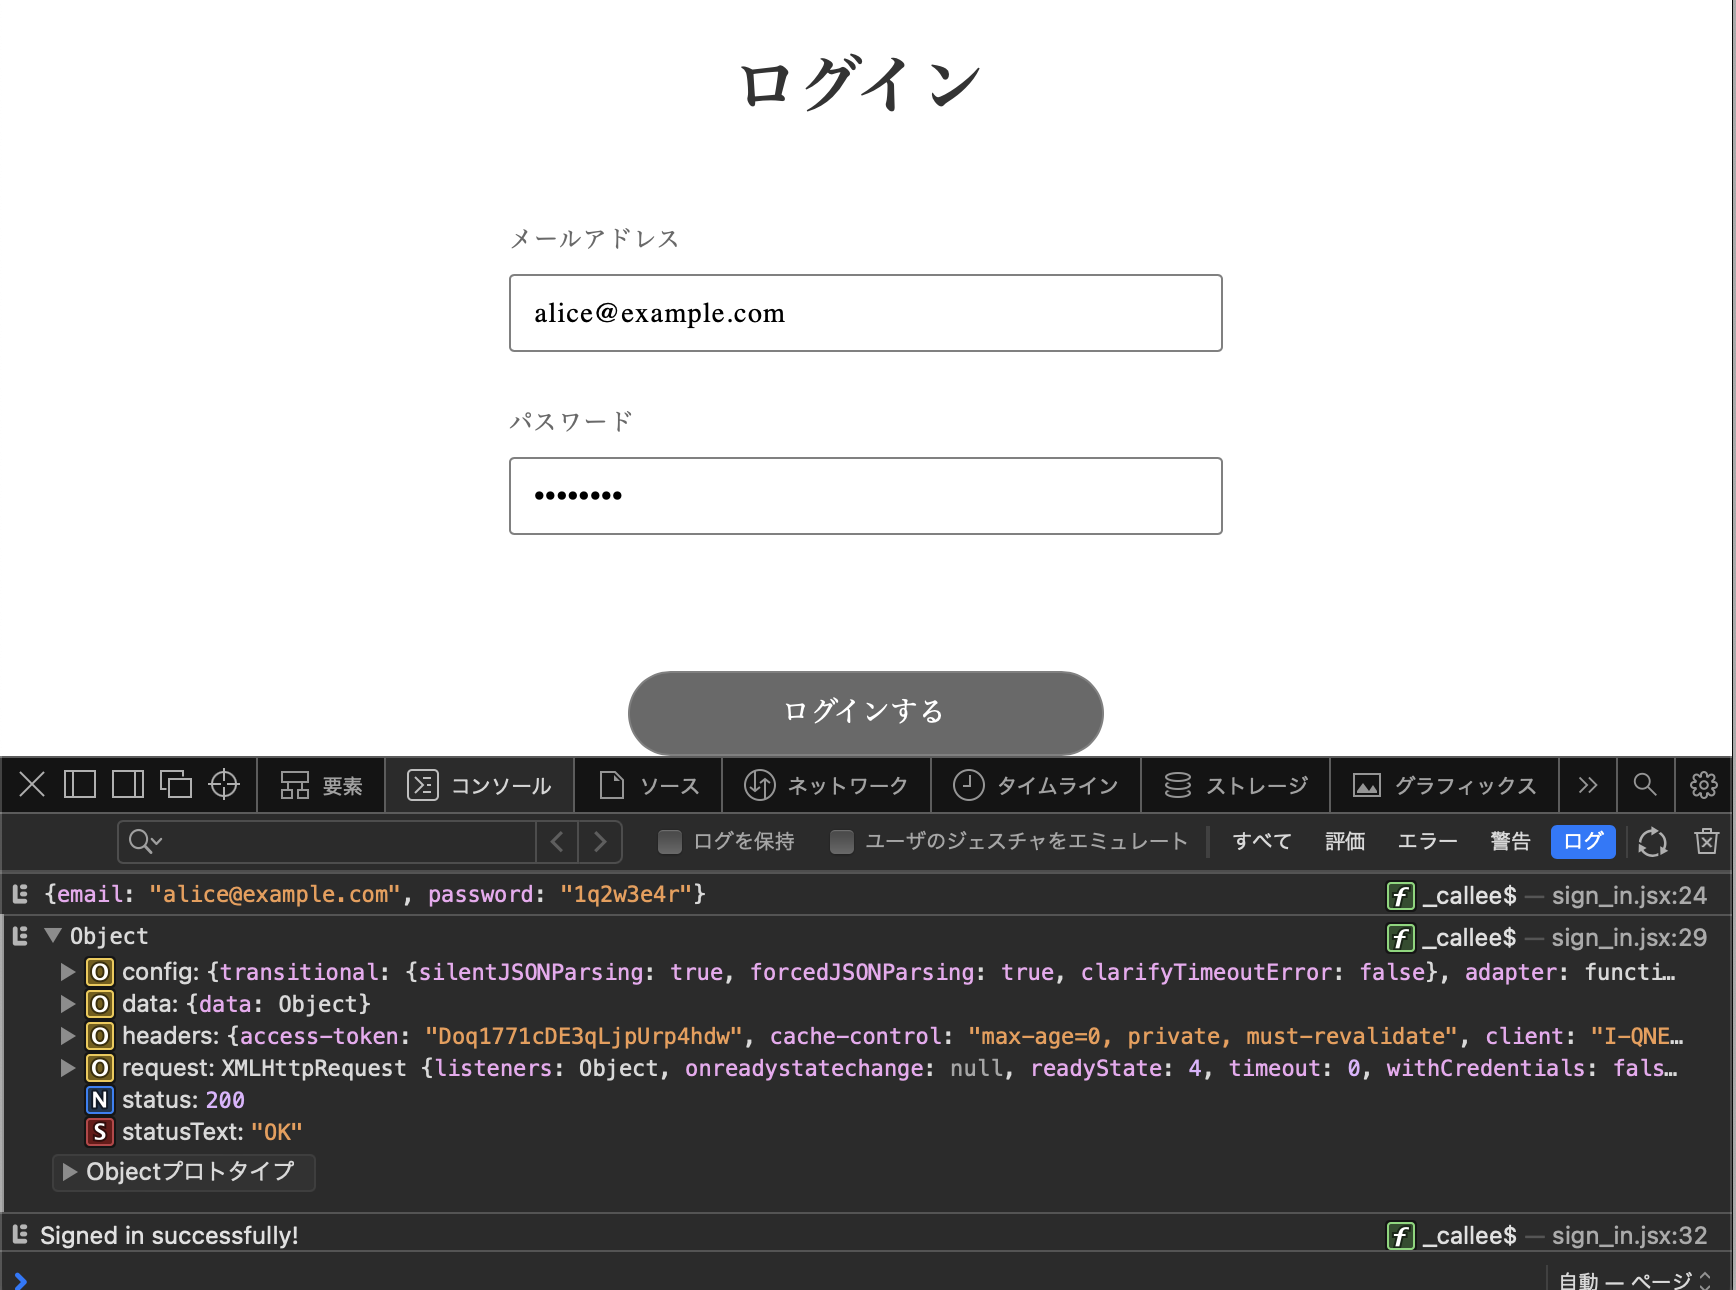
メール認証済みのメールとパスワードを入力して「ログインする」ボタンを押す。 コンソール画面に認証情報が表示されれば、ログイン処理成功である。
git add .
git commit -m "Sign in user"
エラーハンドリング
Alert をインポート。
import { Text, Box, Clickable, TextField, ThreeDots, Alert } from '../atomic/'
SignIn() の中で3つ関数とステートを宣言
const [notifications, setNotifications] = useState([])
const createNotification = (message) => setNotifications([...notifications, { id: Math.random(), message }])
const deleteNotification = (id) => setNotifications(notifications.filter((notification) => notification.id !== id))
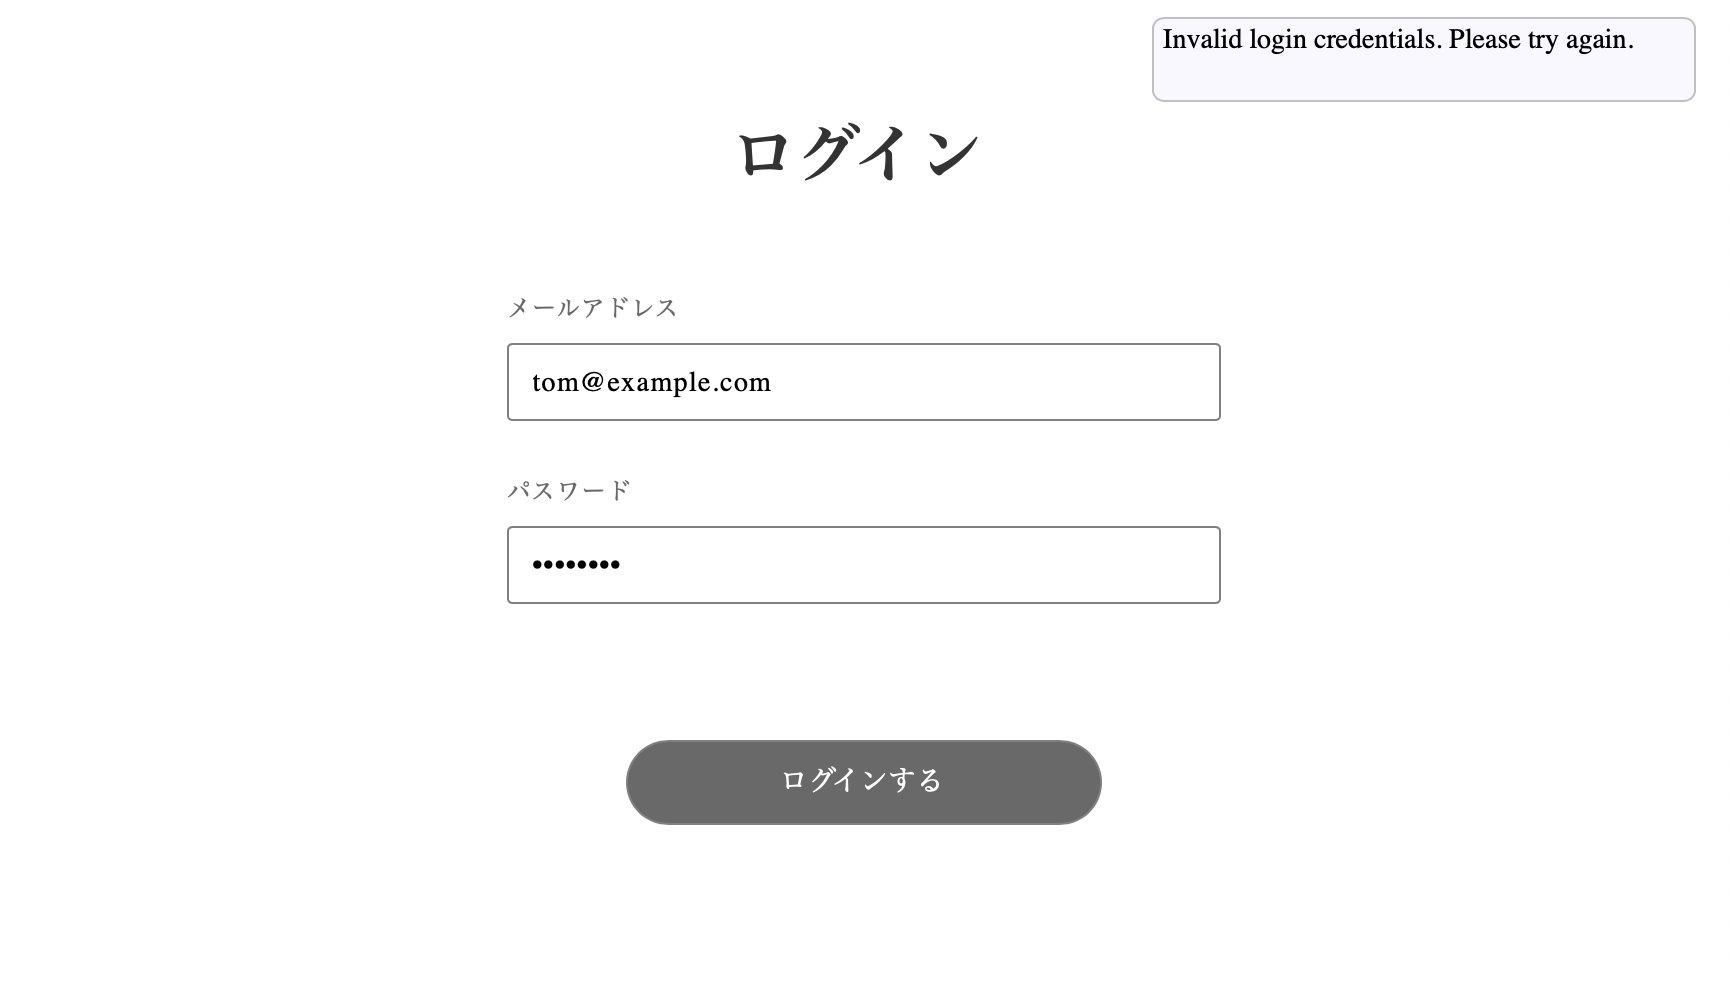
onSubmit関数を編集。
エラーが発生した時に、通知にメッセージを代入している。
const onSubmit = async (data) => {
  const params = {
    email: data.email,
    password: data.password,
  }
  console.log(params)
  setAnime(true)
  try {
    const res = await signIn(params)
    //await sleep(1500)
    console.log(res)

    if (res.status === 200) {
      console.log('Signed in successfully!')
    } else {
      console.log('some thig went wrong')
      createNotification('予期しない問題が発生しました')
    }
  } catch (err) {
    console.log(err)
    createNotification(err.response.data.errors[0])
  }
  setAnime(false)
}
最後に、DOM に Alert を表示する。場所はなるべく下の方に配置しておく。
<Box position="absolute" top="15px" right="20px">
  {notifications.map(({ id, message }) => (
    <Alert key={id} onDelete={deleteNotification} id={id}>
      <Box
        width={320}
        minHeight={50}
        borderRadius={7}
        border="1px solid silver"
        bg="ghostwhite"
        px={5.5}
        py={3}
        style={{ overflowWrap: 'break-word' }}
      >
        {message}
      </Box>
    </Alert>
  ))}
</Box>
git add .
git commit -m "Sign in form error handling"
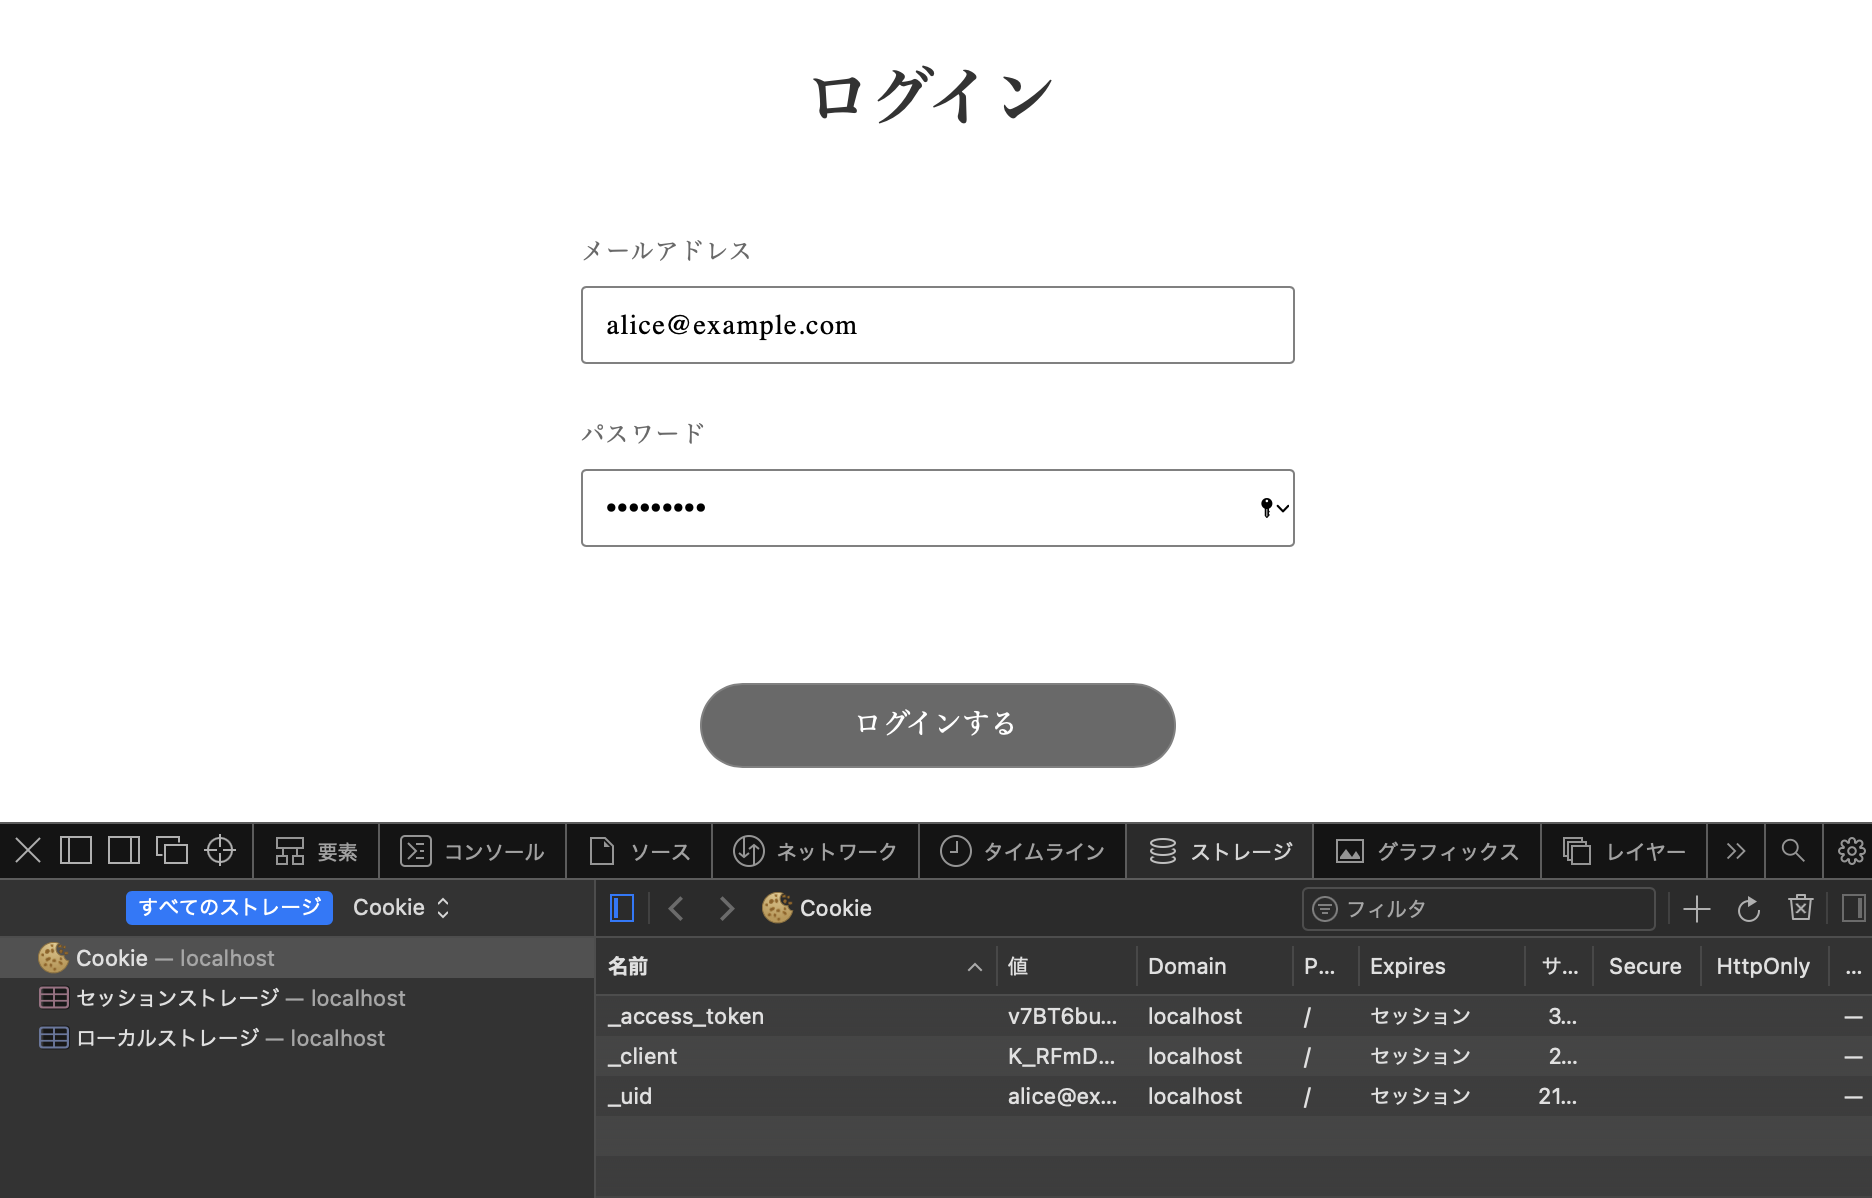
Cookie に保存
サーバーから返ってきたデータには access token が含まれている。 これを Cookie に保存し、今後サーバーにアクセスする時は Header に access token を一緒に送ることで、個人情報を取得できる。
Cookie の情報のアクセスや保存を簡単にしてくれるラッパーライブラリjs-cookieをインストールする。
yarn add js-cookie
ライブラリーのインポート。
import Cookies from 'js-cookie'
onSubmit関数の成功時の処理に Cookie への保存を追加する。
if (res.status === 200) {
  console.log('Signed in successfully!')

  Cookies.set('_access_token', res.headers['access-token'])
  Cookies.set('_client', res.headers['client'])
  Cookies.set('_uid', res.headers['uid'])
} else {
git add .
git commit -m "Set access toke to the Cookie after sign in"
Sessions コントローラー
上の Cookie に保存した情報は、認証済みユーザーとしてサーバーにアクセスするために必要な値である。
それに加えて、ログインユーザーの情報はどこでも使えた方が便利ではある。 なぜなら、メニューにサムネイルを表示したり、コンテンツを作る際に user_id を渡したりするからだ。
簡単な方法として考えられるのは、ログイン時に返ってきた user オブジェクトをそのままローカルストレージに保存してしまうことだが、 この方法をお勧めしている記事はなかった。
代わりに、ページがロードされた時に current_user を取得できる API をたたき、それをグローバルな変数に入れて、使い回す方法が一般的だ。
なので、これから作成する Sessions コントローラーの index action はヘッダーに access token トークンが渡された場合に、current_user の情報を返すだけのものである。
Rails プロジェクトでコマンドを実行し、コントローラーを作成する。
bin/rails g controller auth/sessions
以下を書き込む。
class Auth::SessionsController < ApplicationController
  def index
    if current_user
      render json: { is_login: true, data: current_user }
    else
      render json: { is_login: false, message: "ユーザーが存在しません" }
    end
  end
end
作成したコントローラーをルーティングに加える。
  namespace :auth do
    resources :sessions, only: %i[index]
  end
http://localhost:3001/auth/sessionsがこのアクションのエンドポイントとなる。
git add .
git commit -m "Create a sessions controller"
Auth Context
フロント側に戻り、今度はグローバルで利用できる current_user の作成に入る。
初めに、Context を作成する React の関数をインポートする。
import { useState, createContext } from 'react'
import 構文の下あたりにコンテキストを作成する。
AuthContextは他の js ファイルでも利用するので export しておく。
export const AuthContext = createContext({
  isSignedIn: null,
  setIsSignedIn: () => {},
  currentUser: null,
  setCurrentUser: () => {},
})
メインのMyApp()関数の中で上のコンテキストの実体を宣言する。
isSignedInはユーザーがログインしてたらtrueでそうでない場合はfalseが入いる。
currentUserはサーバーから受け取ったログインユーザーのオブジェクトが入る。
const [isSignedIn, setIsSignedIn] = useState(false)
const [currentUser, setCurrentUser] = useState(null)
最後に全てのページでコンテキストが渡されるようにMyApp()のreutrnの jsx を変更する。
...省略...
  return (
    <ThemeProvider theme={theme}>
      <AuthContext.Provider value={{ isSignedIn, setIsSignedIn, currentUser, setCurrentUser }}>
        <Component {...pageProps} />
      </AuthContext.Provider>
    </ThemeProvider>
  )
これらの設定により、Next.js の全てのコンポーネントでisSignedIn変数、setIsSignedIn、setCurrentUser関数とcurrentUserオブジェクトが利用できる。
ここからは sign_in ページで実際にコンテキストに値を代入しホームページへリダイレクトする処理を書く。
React の Context を利用するための関数useContext とリダイレクトの Next の関数useRouter をインポートする。
import { useState, useContext } from 'react'
import { useRouter } from 'next/router'
AuthContext が定義された変数を_app.jsからインポートする。
import { AuthContext } from './_app.js'
SignIn()関数の中でuseContextとuseRouterを宣言する。
useContextはコンテキストの定義変数AuthContextを引数で受け取り、実際のsetCurrentUser関数などを返す。
const router = useRouter()
const { setCurrentUser, setIsSignedIn } = useContext(AuthContext)
onSubmit関数の正常に処理された場合の if 文の中に Context から取得した関数を実行する。
この処理を加えることでcurrent_user変数にはログインユーザーのオブジェクトが入り、isSignedIn変数はtrueになる。
この値はページをリロードするまで、全てのページとコンポーネントで利用できる。
...省略...
if (res.status === 200) {
  console.log('Signed in successfully!')
  Cookies.set('_access_token', res.headers['access-token'])
  Cookies.set('_client', res.headers['client'])
  Cookies.set('_uid', res.headers['uid'])
  setCurrentUser(res.data.data)
  setIsSignedIn(true)
  router.push('/')
} else {
...省略...
git add .
git commit -m "Create AuthContext"
current_user のセット
sign in した時は current_user にログインユーザーのオブジェクトが代入される。 上でも書いたように、それはあくまでページがリロードされるまでであり、リロードされると current_user は null に戻る。
これではかなり不便なので、ページロード時に1度は current_user の取得を試みて、ログインしていれば、current_user にオブジェクトを入れる処理を作成する。
RailsのAPIモードはセッションを扱う場合に問題を抱えている。 普通に、セッションを使った認証を行うと、このようなエラーが出てくる。
(Your application has sessions disabled. To write to the session you must first configure a session store
エラー文ではセッションが無効なっているからそれを設定しろと言う記述がある。 これの解決策は、下のGithubのイシューの方法を試す。
https://github.com/waiting-for-dev/devise-jwt/issues/235#issuecomment-1116864740
config/application.rb を開いて、class Application < Rails::Applicationの中に以下を記述する。
config.session_store :cookie_store, key: '_interslice_session'
config.middleware.use ActionDispatch::Cookies
config.middleware.use config.session_store, config.session_options
保存したら、railsサーバーを一度止めて、再起動しておく。 コミットもする。
git add .
git commit -m "Enable Session"
React側で、作成したSessionsコントローラーのindexアクションを叩く API ラッパーを作成する。
lib/api/user.jsファイルを開き、上部で js-cookie をインポート。
import Cookies from 'js-cookie'
ファイル一番下にgetCurrentUser関数を追加。
Cookie にログインした際に保存した値がない場合は API を叩かずに抜ける。
// 認証済みのユーザーを取得
export const getCurrentUser = () => {
  if (!Cookies.get('_access_token') || !Cookies.get('_client') || !Cookies.get('_uid')) return
  return client.get('/auth/sessions', {
    headers: {
      'access-token': Cookies.get('_access_token'),
      client: Cookies.get('_client'),
      uid: Cookies.get('_uid'),
    },
  })
}
_app.jsで初回読み込み時の current_user のセットアップを行う。
React の useEffect をインポート。
import { useState, useEffect, createContext } from 'react'
作成したgetCurrentUser関数をインポート。
import { getCurrentUser } from '../lib/api/user'
handleGetCurrentUser関数を作成、ページ読み込み時に API をたたき、ユーザー情報が取得できればsetIsSignedIn(true)とsetCurrentUser(res?.data.data)を実行して current_user を保存。
// 認証済みのユーザーがいるかどうかチェック
// 確認できた場合はそのユーザーの情報を取得
const handleGetCurrentUser = async () => {
  try {
    const res = await getCurrentUser()

    if (res?.data.isLogin === true) {
      setIsSignedIn(true)
      setCurrentUser(res?.data.data)
    } else {
      console.log('No current user')
    }
  } catch (err) {
    console.log(err)
  }
}

useEffect(() => {
  handleGetCurrentUser()
}, [setCurrentUser])
以上で、ログイン処理が完成した。
current_userを利用したい場合はimport { AuthContext } from './_app.js'で AuthContext を呼び出し、
const { currentUser} = useContext(AuthContext)から利用できる。
git add .
git commit -m "Set the current user globaly when page loaded"